CitraSolv Demo

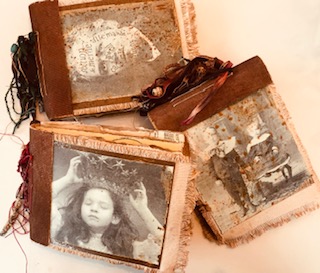
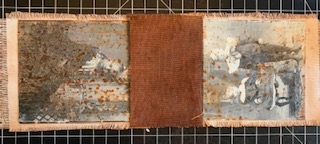
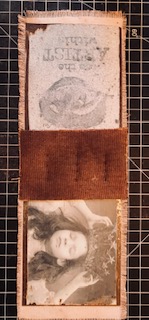
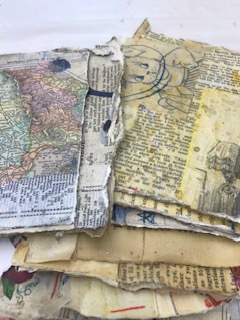
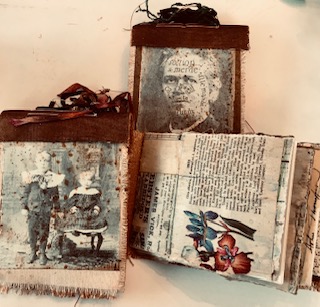
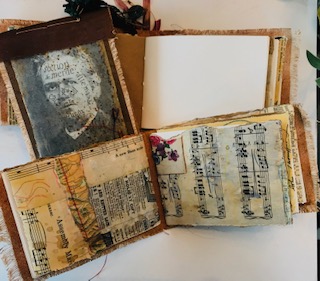
I am so excited to be a guest presenter on, Vintage Page Designs, Handmade Book Club on January 31, 2021! I will be demonstrating a technique using CitraSolv and showcasing how I have used the deconstructed pages in handmade books, journals and on cards. Here is a sneak peek of a finished journal pages.

Technique directions and a list of supplies are in the blog post, Getting Creative with CitraSolv, December 11, 2019.

I’d appreciate it if you would like, share and follow this blog! Cheers!

Love Watercolor and Acrylic Paints, but Hate Dirty Water?

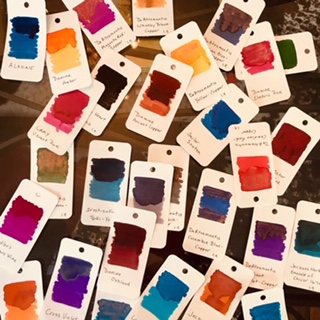
I color sampled and created a color chart of all the bottles shown. Note the clean rinse water to the right of the Silicoil!

One of the things that bugs me is the need to change the dirty water when rinsing water color or acrylic paints from a paint brush. I use two mason jars when I paint, one for dirty and one for clean, but my clean water is soon just as murky as the dirty water. 

I found that Silicoil Brush Tank cleans the brush and all but eliminates the need for a second dunk in clean water before going on to the next color. Silicoil Brush Tank holds 12 0z of water. Simply fill the jar with water, run the dirty brush over the top of the aluminum coil to release the paint from the bristles of the brush. I do have a second jar of clear water to swish the brush in again, but have found little need for this second step. A Silicoil Brush Tank cost about $7.00.

TIPS: 

  • Invest in good brushes for better results. Simply Simmons are great low-cost brushes. If you can afford to spend a bit more, I recommend Escoda Versatil brushes.
  • When done using your brushes clean them with The Masters Brush Cleaner and Preserver.
  • Do not leave your paint brushes standing point down in a jar of water as this will damage and split the bristles.
  • Never smash the paint brush on the bottom of a jar to release paint as the bristles can break.
  • Like to paint when traveling? Use a weekly plastic pill container and fill each day of the week with water and close. Open a “day” to clean a dirty brush.
  • Don’t use the same paint brushes for both watercolor and acrylic paints. Acrylic paints are much harder on brushes. Keep a set for each type of paint.
  • Don’t drink the dirty water! I have done that on more than one occasion!

PRODUCT:

Silicoil Brush Tank

Resource Guides

Confused on which glue to use and when? Which mediums are best for the project you are working on? No clue on fountain pens? Having a tip sheet on basic information can help! Check back often as I continue to add more tip sheets.

person woman eyes face
Photo by Gratisography on Pexels.com

COLOR WHEEL

Deco Arts has some great information on their site on color wheel and basic color theory – Color Wheel and Theory Charts

GLUE

Do It and How has a great chart on what types of glue to use on different surfaces – Craft Glue Usage Chart

FOUNTAIN PENS

Goulet Pens has over 200 fantastic videos on fountain pens – how to clean, inks, nibs, different pen features, paper, you name it and they have a great video on it! Goulet Pen Videos.

black binocular on round device
Photo by Skitterphoto on Pexels.com

MEDIUM

Ever struggle with which type of gesso, gel medium, retarders… to use? Lindsay Weirich, The Frugal Crafter has a fabulous tip sheet. Make sure to follow her blog and YouTube channel. Medium Tip Sheet.

NEEDLES

Struggling with what type of needle to work with your sewing project? John James has a wonderful resource guide –  Getting to the Point – finding the right needle for your sewing projects 

PAINT BRUSHES

ARTJOURNALIST.com has a wonderful article by Chelle on, Acrylic Brushes 101 –  Acrylic Brush

black and white business career close up
Photo by Pixabay on Pexels.com

WATERCOLOR PAPER

Not sure of the different types of watercolor paper? Check out, How to Choose the Right Watercolor Paper, by Ken Bromley Art Supplies.

Do you have some suggestions on tip sheets? Please share and make sure to comment, like and follow my blog! Cheers!

Block Printing is Easy!

IMG_5701

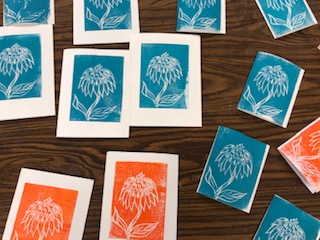
I recently took a class on block printing and I am totally hooked! I remember taking a class eons ago and practically losing a finger trying to cut the linoleum. Well things have changed and while wood and linoleum blocks are certainly an option, rubber blocks make cutting very easy.

Supplies

Steps

  • Cut copy paper to the size by tracing the block.
  • Draw an image in pencil on the paper. Make sure that the pencil lines are darkly drawn.

IMG_5695

  • Place image pencil side down on the block. Tape the paper to the block at the top and bottom.
  • On the top of the taped down paper, use the side of the pencil and cover the paper with the lead. The paper may be gently lifted at one edge to see if the image has transferred to the block.

IMG_5697

  • Once the image has transferred, remove the paper. 
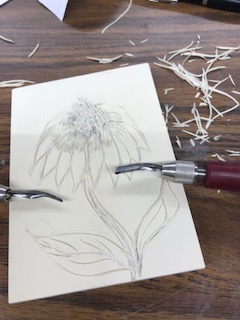
  • With the small y cutting tool, gently cut the outline of the image. While cuts can be deeper, 1/8” is sufficient. Blade come in a variety of widths and types for different cuts.

IMG_5698

  • When done cutting wipe any small pieces off the block.
  • Squeeze or spoon the ink onto the acrylic or glass mat. A little goes a long way.
  • Brayer the ink out NOT by rolling from the bottom of the ink blot, but starting above the ink and coming down on the ink blot. Roll out ink to a very thin and smooth consistency.
  • Once the ink is rolled out, brayer the ink onto the block, covering the entire block.

IMG_5699

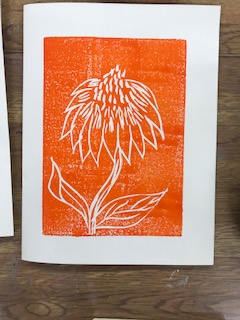
  • Center and place card stock on the top of the inked block. Use the baren and burnish the paper. Take the time with the baren to get good contact with the paper and the block. Slowly lift the paper. Let dry.

IMG_5700

  • Clean the block with a bit of dishwasher soap and water.

Tips

  • To avoid cutting fingers, hold the block with one hand at the bottom of the block and cut towards the top. Turn the block and keep one hand at the bottom.
  • Vary the color of the ink by adding a color to the edges of the rolled out ink.

Please make sure to comment, like, share and follow my blog! Cheers!

Color Charts to Organize Supplies

IMG_4762

Ever been to the store and picked-up an art supply only to come home to find that you already had the color? I have done this too many times to count.  It’s time to take inventory of what you have! Here are color charts of many of the products that I use (don’t judge!). Once you take inventory, snap a photo with your phone and the next time you shop, your inventory will be at your fingertips! Note – wherever possible, I went directly to the supplier for the chart. In some cases I linked to charts on Pinterest.

ACYRLICS PAINTS

DecoArt Media Fluid Acrylics Color Chart

Golden Fluid Acrylic Color Chart

Golden Open Acrylics Color Chart

PaperArtsy Acrylic Paint Chart 

PaperArtsy Acrylic Paint Chart Fill In

Pebec Acrylic Color Chart 

ALCOHOL INKS

Jacquard Pinata Alcohol Ink Color Chart

Tim Holtz/Ranger Alcohol Ink Color Chart

BLOCK PRINTING INK

Speedball Block Printing Ink Color Chart

IMG_5699

Dr. Ph. MARTIN’S PRODUCT COLOR CHARTS

Dr. Ph. Martin’s Color Charts

DREAMWEAVERS EMBOSSING PASTES

Dreamweaver Pastes Color Chart

DRIED PAINT PIGMENT

Brusho Color Chart

EMBROIDERY THREAD

Coats and Clark Thread Color Chart

DMC Thread Color Chart

FOUNTAIN PEN INKS

Col-o-ring ink Testing Book 

02A96E8E-605C-4CA2-BC06-791481F606FE.JPG

Swatch the ink and keep the colors on the ring or file in a three ring binder using baseball trading card plastic sleeves.

GELATOS

Faber Castell Gelatos Color Chart

GLITTER

The Art Institute Art Glitter Color Chart

Elizabeth Craft Silk Microfine Glitter Color Chart

Ritz Micro Fine Glitter Color Chart

MARKERS

Copic Marker Color Chart 2019 Fill In

Copic Marker Color Chart with 358 Colors

Faber-Castell Pitt Artist Pens Brush Color Chart

Posca Pen Color Chart

Tombow 108 Color Markers Color Chart

IMG_5711

Info on this Copic Marker storage unit is in the my most recent organizing article.

MICA POWDERS

Pearl EX Color Chart

Perfect Pearls Color Chart  Color chart that prints out is not true to color, but it will help.

PANPASTEL

PanPastel Color Chart

PENCILS

Blackwing Color Pencil Color Chart

Caran D’Ache Color Chart

Derwent Inktense Pencil to Ink 72 Pencils  Color Chart

Derwent Watercolor Pencils Color Chart

Derwent Products Color Charts

Faber Castell 166 Pencils – Polychromos Color Chart

Faber Castell 120 Color Polychromos Fill In Color Chart

General’s Pastel Chalk Pencils Color Chart

IMG_4928

Koh-I-Noor Progresso Pencils Color Chart

Prismacolor Pencil 150 Color Chart Filled In 

Prismacolor Pencil 150 blank Color Chart

Stabilo Carblthello Pastel Color Pencils Color Chart

Stabilo Woody 3 in 1 Pencil Color Chart

Tombow Irojiten Colored Pencils 90 Count Color Chart

RANGER PRODUCT COLOR CHARTS –

TIM HOLTZ, DINA WAKLEY, WENDY VECCHI, PERFECT PEARLS, SIMON HURLEY, STICKLES, ICE RESINS, DYLUSIONS 

SPRAYS

Tim Holtz Oxide Spray Color Chart Fill In

STAMPING INKS

Ranger Archival Ink Color Chart Fill In

Tim Holtz Distress Ink Color Chart Fill In

Tim Holtz Oxide Ink Color Chart Fill In

WATERCOLORS

Coliro Pearlcolors Color Chart

Daniel Smith Watercolor Color Chart 

Daniel Smith Primatek Color Chart

Derwent Inktense Blocks Color Chart

QoR Watercolor Color Chart

Schmincke Horadam Aquarell Watercolor Color Chart

IMG_4511

TIPS

  • Don’t feel overwhelmed by this project. Each time you take out a supply, do the inventory just for that one product.
  • Laminate the color charts and store with the product or in a binder. Update new colors after shopping with a Sharpie!
  • Keep your charts handy when shopping online. These small purchases can get you to the free shopping limit!

What charts would you like to see added? Send me the link and I will add it. Stay tuned for an article on resource guides – which glue to use and when, what colors work together, difference in types of gel mediums, what paint brush should be used…

Please feel free to comment, like, share and follow me. Cheers!

More Art Supplies That Are Sparking Joy!

cropped-pencils_set_table_artist_11240_1680x1050I am not going to lie, I love art supplies. I like walking around a store and checking out what’s new, drooling over websites that carry my favorites, and have a wish list in my notebook of things I’d like to try. What about you?

Here are some more supplies that spark joy!

FOUNTAIN PENS

My love of fountain pens continues to grow. I have been having fun “penabling” my family and friends that haven’t tried fountain pens or used them “back in the day”. Aside from the Platinum Carbon, which is an excellent starter pen, I would highly recommend the Pilot Varsity. The disposable Varsity comes in seven color and can be bought as a set for about $10. Enough pens to hoard or share!

IMG_5646

PENCILS AND ERASERS

As promised in my earlier article on art supplies, I have tried Blackwing pencils and they are well worth the $2 a piece price. They come in a variety of hardness and float and skim across the page. I am not a fan of the attached erasers (which can be replaced) on the Blackwing. My favorite eraser is still the Moo Eraser. A follower recommended that I try the Matomarukum, black eraser and I will say that it works well too. 

If you want a big chunky pencils perfect for journalling and water soluble, try the Stabilo Woody 3 in 1 pencils. These colored pencils are watercolor and wax crayons all in one and come in a variety of colors including metallics. They are so much fun. Note – the Woody will not fit a standard size pencil sharpener.

IMG_5727

SHARPENERS

If you have an investment in any type of carbon, charcoal or colored pencils then I would suggest getting a good sharpener. Two are my favorite are the Blackwing sharpener by Kum and the second is made by Stabilo. The Blackwing has two sharpening chambers, one to cut the wood and the second to shape the point.  The Stabilo swan sharpener has both form and function; I adore the swan shape and it it works very well for standard size pencils. 

IMG_5723

LEARNING

Online Classes – It is possible to go online and find information on just about any art topic; unfortunately, all are not created equally. If you want to learn bookbinding, my absolute favorite site is, Vintage Page Designs – www.vintagepagedesigns.com. The site has wonderful free tutorials as well as a budget friendly monthly program.

Books – Sometimes in order to dig into a subject in more depth, nothing beats a great book. Here are a couple of my favorites. I found all on Amazon – www.amazon.com and was able to pick them up used at great prices.

IMG_5726

  • Paper Making – If you want to try paper making I highly recommend, The Papermaker’s Companion, by Helen Hiebert.
  • Book Making – Want to try your hand at making books? Pick up a copy of, Making Handmade Books 100+ Binding Structures & Forms, by Alisa Golden. You won’t be disappointed in this highly detailed and illustrated book.
  • Embroidery and Stitching – I love adding embroidery to my art work and, Erica Wilsons’s Embroidery Book, by Erica Wilson is the bible on all types of stitches.

Luna – My cat Luna, my constant companion in the studio. She brings me joy each day!

IMG_4851

Check out my previous articles on art supplies that spark joy, by using the search bar on the main page. Have a favorite art supply? Be sure to comment!

Please make sure to comment, like, share and follow me. Cheers!

The Art of Organizing – # 2

New Year, new resolutions on organization. I must admit that I am  pretty organized when it comes to my art studio. I want to spend time working on projects and creating and a good organized space helps me to jump right in when I have the time and the creative ideas start flying. Here are some of the organizing systems that work for me.

Store Similar Items Together

The key to organizing is to store items that are similar together or that are used for a specific project. For instance, I store all my dies together, but dies with matching stamps are stored together as sets. One of the project items that I store together are my block printing supplies – block printing paint, lino cutters, cutting blocks and baren all go in the same container. This system makes it easy to start a project.

Label Supplies

No matter how you store your supplies, in totes, shoe or decorative boxes, bins or plastic carton labeling the contents on the outside  of the container will help tremendously. Labels can be as simple as marking the container with a Sharpie, printing labels out on the computer or using a label maker. I highly recommend the Dymo LetraTag available at Staples – www.staples.com or at Blick’s www.dickblick.com

Vintage binders labeled and used for die storage. Labeled storage container with tied tag for A2 envelopes.

Store Creatively

The mantra today is repurpose and reuse items. I love the thrill of the hunt when I go thrifting and enjoy finding unusual items for my studio. My latest find is just one example. I have quite a few bottles of ink for fountain pens, as well as India ink for dip pens. While I would love to display the ink bottles, having a new kitten who likes knocking things down makes displaying the bottles problematic. I found a new storage solution when I repurposed an old beat up tool box. Adding new crystal knobs gave it a bit of glitz.


One of my favorite storage solutions was creating a box for Copic markers. Inside the  decorative box are two layers of aligned ceiling grids spaced about four inches apart. Square dowel rods placed in each corner connect and anchor the two grids. The marker are stored in color order based on the Copic color chart.

My pens continually rolled off the vintage typing table that I use for my desktop computer. I found a vintage glass (frog) flower holder can do double duty to hold pens.

IMG_5646

I have tried many ways to store dies and nothing had worked for me. I had seen when some folks used magnetic sheets, placed them on the wall and then adhered the dies to the sheet. This isn’t my preference. Instead I found some very old and sturdy binders, bought magnetic vent covers, cut them to the size of heavy duty three ring page protectors and store the dies this way. Binders are set up by shapes, holidays, word, birds and flowers. The front of the page protector has the packaging from the die and the back magnetic side holds the dies.

Note Taking

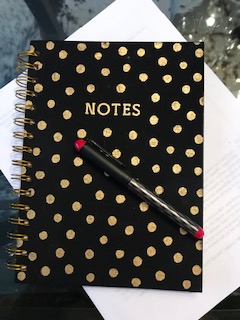
I like to take notes when I go to a class, watch a YouTube video or try a new technique. What ended up happening was that I had scraps of paper or sticky notes scattered around. Now I keep one notebook for all my my jottings. I use washi tape at the top of each new idea page. I also add information on the when, where and whom taught the technique. If written instructions are given in the class, I place them in the book with washi tape.
IMG_5720

Tips

Gather like items together before you start to organize. Purge any items that you no longer use. Donate to schools, nursing homes, homeless shelters or charity store.

Be creative and reimagine items for storage solutions.

Please be sure to comment, like, share and follow me! Cheers!

Book Making Part 3 – How to Assemble a Book


IMG_5628

If you can sew with a needle and thread, you can make a book. The steps are very easy and simple to do. There are many resources online and my favorite site is, Vintage Page Designswww.vintagepagedesigns.com. The owner of the site, Ali Manning is wonderful and has excellent tutorials. If you want to really learn book making, Ali has a subscription program with a new book tutorial every month. Another great resource is the book, Making Handmade Books 100 + Bindings and Structures & Forms, by Alisan Golden. I found this book second hand on Amazon – www.amazon.com.

IMG_5340

Supplies

  • PVA glue – Books by Hand – www.booksbyhand.com
  • Heavy chip board or book board
  • Waxed thread – available at craft stores. I found a great selection of colors on etsy – www.etsy.com 
  • Needle
  • Scrap paper to make hole template
  • Pencil
  • Ruler
  • Awl
  • Bone folder – my new favorite is a large flat teflon bone folder  www.amazon.com
  • Paper trimmer – my favorite is, Fiskars 12” ProCision Rotary Bypass Trimmer – www.fiskars.com
  • Kraft knife – Fiskers Soft Grip Detail Knife – www.amazon.com or www.target.com
  • Paper – Any type of paper can be used for the book pages

Optional Supplies

Steps

When I made my books I did not use chipboard or book board as the tin plates were thick enough to support the structure. Instead, I chose to use a heavy canvas fabric. I measured the cloth leaving enough room between the tin plates for the signatures (pages) to fit in. I also wanted the canvas to extend beyond the edges of the tin on all four sides, so I added that into the measurement calculations. Prior to assembly, I sprayed both sides of the the cloth with Tim Holtz’s Distress Sprays to age the cloth. I frayed the fabric by pulling loose threads.

IMG_5340

Next I glued the canvas to the back of the tin making sure to leave a space between the front tin and back tin for the signatures to fit into the middle of the book.

IMG_5342

Once dry, I flipped the book over to the front and glued a metal mesh screen to the spine.

To make the signatures, I used the collage paper (Part 2 of this series) I had made and measured to the length and height of the book (minus fringe). I folded the paper in half making a sharp crease with a bone folder. My pages were very thick, so I put them in a book press overnight. Make sure to leave your signatures under a heavy weight (a pile of books will work) overnight, or the book will not shut properly. I decided my book was a bit too thick with every page being collaged paper, so I inserted watercolor paper for some of the pages. I used four sheets of paper folded in half for each signature and made four signatures. I like the pages in my signatures uneven. If you don’t want uneven paper edges, trim with paper trimmer or kraft knife.

IMG_5343

I used a template and made holes in the spine for the signatures.  Using the hole template use an awl to make holes in the signatures. A book cradle is a wonderful tool and worth the investment if you plan on making books. I got my book cradle from, Vintage Page Designswww.vintagepagedesigns.com.

I sewed the signatures into the spine. Beads and fibers were added to the finished spine.

If you haven’t read Part 1 and 2, check out the articles!

Don’t forget to like, share and comment. Cheers!

Book Making Part 2 – How to Create Layered, Aged Collage Paper

IMG_4896

When was the last time you created a collage of images? Grade school? High school art class? Well, it’s time to again try collage to add interest and dimension to your art projects. Collaging has been around for decades and the steps are very simple.

Supplies

  • Ephemera – think outside the box and collect lots of items – pages from books, maps, recipe cards, calendars, receipts (old handwritten), handwritten letters and notes, greeting cards, tissue paper, dress pattern tissue, embroidery transfer tissue, coloring book pages, flash cards, match book covers, address book pages, onion skin typing paper, postage stamps, sheet music, library index cards… Personally, I don’t use images from glossy magazines, but feel free to incorporate.
  • Gel medium like Golden Regular Matte Gel – www.dickblick.com or Yes Paste https://www.amazon.com/YES-Glue-Yes-Paste-Pint/dp/B01M5HA0X2.
  • Glue stick. My favorite is the UHU glue stick available on Amazon – www.amazon.com.
  • 1“ – 2 “ craft paint brush
  • Paper to adhere collage to. You can collage the ephemera to any size paper. Think outside the 8.5” x 11” rectangle. Kraft paper comes in big roll and is fairly inexpensive. Kraft paper bags are a great option too.
  • Scissors

Optional Supplies

  • Plastic table cloth
  • Heat gun – I have had several and I like the Wagner Studio Precision heat gun – www.amazon.com
  • Acrylic paint – I like PaperArtsy Acrylic Paints www.paperartsy.co.uk, but you can use any brand.
  • Water
  • Paper towel
  • Spray bottle  – Tim Holtz mini mister spray – www.timholtz.com
  • Ink pads to edge paper not to stamp images on the paper
  • Stamps – if stamping images use a waterproof ink – Stazon  Tsukineko – www.tsukineko.com or Amazon – www.amazon.com.
  • Blending tool for ink pads
  • India inks
  • Color pencils – I like Stabilo and Prismacolor pencils – www.dickblick.com
  • General’s charcoal pencil extra soft – www.dickblick.com
  • Ink pens – Platinum Carbon is my all time favorite and very inexpensive – Amazon – www.amazon.com
  • Metallic/Mica spray – Heidi Swapp sprays are great – www.heidiswapp.com

Steps

  • If you want a more aged look to the collage, ink the edges of some of paper with an ink pad and blending tool. It is easier to do this step before laying down pieces.
  • Rip and tear pieces of the ephemera. Continue to do so as you work on the piece to fill in blank areas and to add interest.
  • If desired, cover work surface with plastic table cloth.
  • To make the pages for my book, I laid down a sheet of kraft paper to cover my table. If making a collage for book pages, think about the size of the signatures. Collage paper can be ripped or cut to size from a larger sheet to make multiple pages or signatures. In my book I used both collaged and watercolor paper for the signatures. 
  • Using a light layer of gel medium or glue, brush background paper with glue.
  • Place ephemeral down creating a base surface. Brayer paper down with your hand. Make sure to overlap and tilt paper at various angles. Let dry or use heat gun (make sure not to burn the paper).
  • Lay additional layer of ephemera down and brush top of paper with glue to adhere.  Make sure to overlap ephemera to the base pages. Let paper extend over the edge of the base layers. Trim as needed. Fill in space with torn pieces of ephemera. 
  • Use glue stick to adhere any edges that are sticking up.
  • If desired, stamp images on with rubber stamp using waterproof ink.
  • Apply a thinned down layer of glue to the entire surface. Let dry.

Collage can now be used for art projects.

Additional Steps for Aged Look

  • Select an acrylic paint in a brown or yellow hue. Water down the color to a wash consistency. Brush mixture over the collage. If the color is too dark, wipe off with a paper towel. Let wash puddle where edges meet. Let dry or dry with heat gun.
  • Use color pencils to mark, doddle, edge, and fill in areas.
  • Shade images with charcoal pencil.
  • Write notes, underline words with pencils or ink pen.
  • Mist or use paint brush to add spots of color with acrylic paint or India inks.
  • Spray with a mica based spray if shimmer is desired.
  • Rim a glass with paint or ink lay on surface to create circles on the paper. Tilt paper to create run lines on the paper.

IMG_4896

Tip

To avoid clogging mica spray bottles, don’t shake the bottle, roll bottle between your hands to mix.

Book Making Part 3 – How to Assemble a Book will be posted next week.

Please make sure to follow this blog and like, share and comment. Cheers!

New Year New Technique – Book Making Part 1 – Photo Transfer Images on Metal

IMG_5628

I tend to have a stash of art samples and incomplete projects, as well as lots of ideas spinning around in my head. I am just starting to learn book making and I thought I would dig through my stash and see what I might use to make a book. Inspiration struck when I found some photo images that I had transferred onto metal. I learned the technique when I attended a class at, Shake Rag Alleywww.shakeragalley.com, with Leighanna Light – www.leighannalight.com. I had the tin pieces and thought that they would make great book covers.

IMG_5629


IMG_5631

Book Making Part 2 – How to Create Layered, Aged Collage Paper for Book Making. Part 2 will be posted next week

Part 3 will be posted in two weeks, Book Making Part 3 – How to Assemble a Book

Please make sure to like, share and comment on this post. Cheers!